Where small engines rise from the grave
Follow me on my journey as I attempt to return
abandoned lawn tractors, engines and implements
to working condition.
Sunday, January 28, 2018
Wednesday, January 17, 2018
Lathe Installation
 I calling this lathe installation because the lathe is moving to its working location and hard wired to the buildings electrical system.
 The motor is on the tower and the tower is bolted to the wall with one bolt. Need to see if I need the 2nd one and then figure out how to make that happen.
The plan is to use 1/2" thin wall metal conduit down the wall and under the lathe then up to the drum switch. Run the switched wires back up the same conduit and into the box then small armor cable to the motor. That should be a 'fun' bit of conduit bending. It has to clear the edge of the chip tray (in case I get it installed later) and drop to go under the lathe bed then a 90 up to the drum switch.
Need to add images here.
Thursday, January 25, 2018
First chips on Tuesday. Faced the hub on an old aluminum pulley. The bit was one I just picked up. I'm sure it could use sharpening.
Saturday, January 13, 2018
Lawn and Garden Tractor Update
Removed the JD111, JD160, and the old Murray 11HP with no rear end from the van truck. I pulled the motor from the Murray 11HP. I think it will go into that strange Murray that shoots grass out both sides of the deck. The DYT4000, LT1000(2) and the Murray with the Brigs Oppy went into the truck. No point in having good tractors outside and junkers inside. Need to figure out a better outside place to store the JDs.
Was gifted with a Cub Cadet ZT. This is the one I worked on several times. After I put a new PTO clutch it developed other hopefully minor problems and the owner just wanted a new one. I tucked it under a 1000 poly tank for the winter. Not sure what I'm going to do with the thing. Its a nice ZT but I really have no use of it.
Was gifted with a Cub Cadet ZT. This is the one I worked on several times. After I put a new PTO clutch it developed other hopefully minor problems and the owner just wanted a new one. I tucked it under a 1000 poly tank for the winter. Not sure what I'm going to do with the thing. Its a nice ZT but I really have no use of it.
Shop Wiring For Lathe
The pla n is to setup the lathe motor for 220V and piggyback it to the breaker connect to the round outlet on the bottom left of the box, that I have yet to use. The wires will use the conduit on the upper right which is empty.
The image below did not come out well. IPhone X camera was having fits. The conduit to the right of the first connector was already in place. The next two bits and the box were added. It was easier to use 2 sections for the double bend on the left side of the post. I'm still debating on what plugs and sockets if any will be used. Not much of a down side to hardwiring it. Maybe even drop conduit out the bottom of the box and have it connect to the drum switch. Need to see if that makes sense.
 n is to setup the lathe motor for 220V and piggyback it to the breaker connect to the round outlet on the bottom left of the box, that I have yet to use. The wires will use the conduit on the upper right which is empty.
The image below did not come out well. IPhone X camera was having fits. The conduit to the right of the first connector was already in place. The next two bits and the box were added. It was easier to use 2 sections for the double bend on the left side of the post. I'm still debating on what plugs and sockets if any will be used. Not much of a down side to hardwiring it. Maybe even drop conduit out the bottom of the box and have it connect to the drum switch. Need to see if that makes sense.
Thursday, January 4, 2018
Sidney Lathe Assembly
Added the saddle, apron, and headstock base.
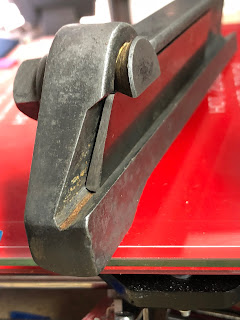
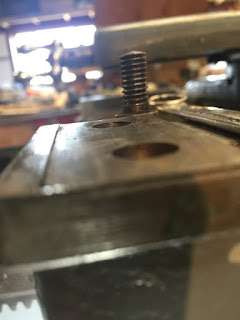
The carriage is held to the ways by a small block bolted to the bottom of the saddle and bearing on the lower side of the ways. The area resting on the ways is higher than the area bolted to the saddle. There is play. I'm wondering if this needs to be eliminated to prevent chatter.

According to Chirpy this does not need to be tight because the turning work forces the saddle down on this side.
Update: I may have had the plate positioned incorrectly. I put it back on after taking these pictures and there is no noticeable play.
 Snugged up the front headstock bearing without shims. Used a drift in the back of one of the mounting holes and managed to turn off the face plate. I will have to chase that hole but its not big deal in terms of lost thread.
The interior taper does not look good.
I'm about to where I need to start thinking about the motor and counter shaft. A shortcut would be to temporally use the motor off the Jet dust collector if it would work. Or maybe permanently.
Started on the motor today. Got it taken apart. Looks better than I expected. Tomorrow I plan to wash the motor end covers in the heated parts was to degrease them. The brushes stay with armature Its a funny setup. All the brushes are in one big holder. It has a flat communicator which I cleaned with fine sandpaper.
Painted the motor yesterday. From now on I will try to paint it after assembly.
Looked at the counter shaft. Never seen a bearing tightened like this. Backing them off allowed it to turn easily and the top half of the bearing I inspected looked good.
Played with the countershaft. Had to add lead weights to the tower for balance.

sss
The carriage is held to the ways by a small block bolted to the bottom of the saddle and bearing on the lower side of the ways. The area resting on the ways is higher than the area bolted to the saddle. There is play. I'm wondering if this needs to be eliminated to prevent chatter.

According to Chirpy this does not need to be tight because the turning work forces the saddle down on this side.
Update: I may have had the plate positioned incorrectly. I put it back on after taking these pictures and there is no noticeable play.
January 4th
Mounted the backgear and spindle. Snugged up the front headstock bearing without shims. Used a drift in the back of one of the mounting holes and managed to turn off the face plate. I will have to chase that hole but its not big deal in terms of lost thread.
I'm about to where I need to start thinking about the motor and counter shaft. A shortcut would be to temporally use the motor off the Jet dust collector if it would work. Or maybe permanently.
January 5th
Started on the motor today. Got it taken apart. Looks better than I expected. Tomorrow I plan to wash the motor end covers in the heated parts was to degrease them. The brushes stay with armature Its a funny setup. All the brushes are in one big holder. It has a flat communicator which I cleaned with fine sandpaper.
January 7th
Painted the motor yesterday. From now on I will try to paint it after assembly.
Looked at the counter shaft. Never seen a bearing tightened like this. Backing them off allowed it to turn easily and the top half of the bearing I inspected looked good.
This is kind of interesting. The felt wick of the bottom bea on the left soaks up oil from the reservoir on the right.
January 9th
Played with the countershaft. Had to add lead weights to the tower for balance.

sss
Monday, January 1, 2018
Sidney Lathe Assembly Begins
I have been somewhat negligent in keeping up the blog. Most all the parts are cleaned and painted. The quick change gearbox needs more cleaning and paint. The lead screw needs cleaning and maybe paint.
Subscribe to:
Posts (Atom)


