Need to keep this link handy
Not much but its a starting place for welding VR
Thursday, November 15, 2018
Thursday, October 25, 2018
Concrete pads for under double wide piers
The cheap skates that installed my double wide place concrete block on edge directly on the ground. They are supposed to sit on pads.
The plan is to cast what amounts to beefy pavers to act as a foot.
Each 80 lb bag of concrete yeilds .6 cubic feet of mix. I want to add lime and the net says to use 1:1 cement to lime. By doing this I am cutting my sand and gavel ratio in 1/2. Going to skip the lime. Would only be a good idea if I was not using the quickcrete mix as I don't know whats in it for sure. Just being careful.
An 80lb bag of quickcrete yields ".6 cf " or ".6 x 1728" or 1037 ci of mix.
A 2x4 is 3.5" high.
If I make my form 22x22x3.5 inches it will take 1694 so two 80 lb bags will give a comfortable margin of 380 ci. This gives me 2 inches on each side of an 18x18 inch pier. I would imagine this will dramatically reduce the psi on the ground and keep the house level longer. Keeping it dry would help greatly.... but that is not always possible.
Still need to work out what to do on top of the pier. If I start the bottom block row correctly I can come out with top block at a right angle to the supporting beams. But I want to think about casting top caps maybe with angled tops. Just thinking
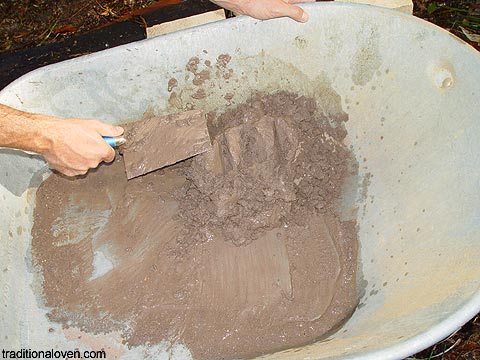
For each 80 lb (36.3 kg) bag of QUIKRETE® Concrete Mix to be mixed, add approximately 6 pt (2.8 L) of fresh water to the mixer. Turn on the mixer and begin adding the concrete to the mixer. If the material becomes too difficult to mix, add additional water until a workable mix is obtained.
The plan is to cast what amounts to beefy pavers to act as a foot.
Each 80 lb bag of concrete yeilds .6 cubic feet of mix. I want to add lime and the net says to use 1:1 cement to lime. By doing this I am cutting my sand and gavel ratio in 1/2. Going to skip the lime. Would only be a good idea if I was not using the quickcrete mix as I don't know whats in it for sure. Just being careful.
An 80lb bag of quickcrete yields ".6 cf " or ".6 x 1728" or 1037 ci of mix.
A 2x4 is 3.5" high.
If I make my form 22x22x3.5 inches it will take 1694 so two 80 lb bags will give a comfortable margin of 380 ci. This gives me 2 inches on each side of an 18x18 inch pier. I would imagine this will dramatically reduce the psi on the ground and keep the house level longer. Keeping it dry would help greatly.... but that is not always possible.
Still need to work out what to do on top of the pier. If I start the bottom block row correctly I can come out with top block at a right angle to the supporting beams. But I want to think about casting top caps maybe with angled tops. Just thinking
For each 80 lb (36.3 kg) bag of QUIKRETE® Concrete Mix to be mixed, add approximately 6 pt (2.8 L) of fresh water to the mixer. Turn on the mixer and begin adding the concrete to the mixer. If the material becomes too difficult to mix, add additional water until a workable mix is obtained.
Forms are done. Tomorrow we pour.
------------------------------------------------
Tomorrow is today: This did not go well. Under calculated the amount of mix by nearly 1/2. Used X when I should have used Y sort of thing. And the old mixer does not clean out well. The mixer does not have a stop where I wanted the barrel tilted. It fell and dumped the mix on the ground. Duh!
 And worst of all my elbow feels like there is a spike through it. Actually getting better now. But no heavy lifting for a few days. Sigh Do you suppose moving the lathe apron and gearbox around has anything to do with it. And the vibrating table with a chunk of concrete in the bottom does not help either. Was thinking my back would be the part giving me grief. Oh well. This will give me some time to fix the head gasket on the DYT4000 and with that out of the shop maybe I can move the backhoe in and use it for a shop crane. LOL not that it would be the first time.
Given that the block will be 1 cf and weight 150 lbs I will be casting them all in place. I can do the outside ones by myself but will need someone to fill a tub/sled on a rope to pull the mix under the house.for the interior ones. Maybe even make a tub on push mower wheels.
Casting them in place will also make it easier to get a good fit to the ground. I am thinking, famous last words, it is level under there and I can mostly just set the from on the ground and pour.
Wednesday, October 10, 2018
Sidney Lathe Apron Gears
I am back working on the Sidney Conehead Lathe. When I first put it back in operation gears in the apron were too mangled to turn. Either from a lathe crash or attempts to move the carriage with the gears packed with swarf.
Two videos on the subject. If the first I make some progress with a file but no joy.
In the second I manage to get a bit more movement and finish off the process by running the gears with valve lapping compound. AKA lapped the gears. This one may still be uploading.
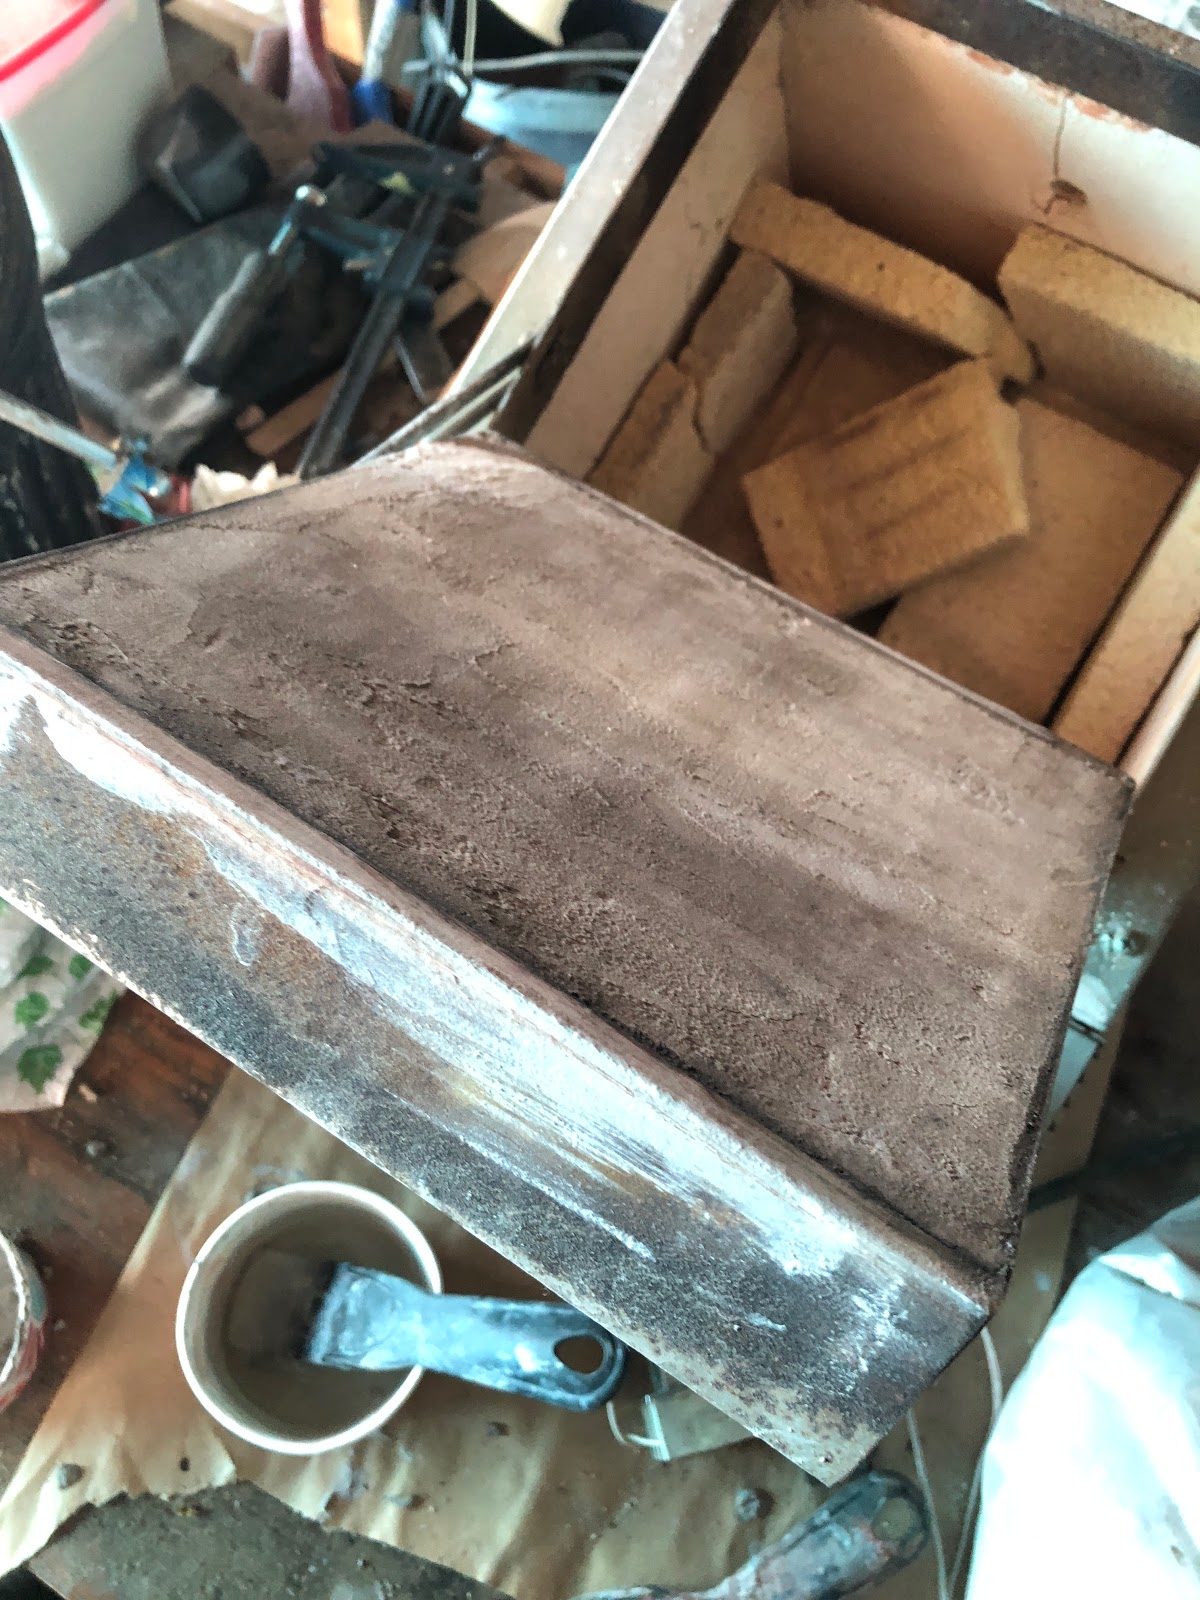
 This afternoon. I ran all the parts I had been working on through the parts washer and coated then machined surfaces with WD40. For some reason they don't look clean in the picture.
There is still some fitting to do to make it right but its on the way.
Thanks to everyone who made suggestion. Even ones that don't work out help in that they get the juices flowing.
The apron is assembled but I am going to tear it down and add some wicks. Shoot a bit more video to replace some not so good stuff.
Two videos on the subject. If the first I make some progress with a file but no joy.
And the 30 second version.
In the second I manage to get a bit more movement and finish off the process by running the gears with valve lapping compound. AKA lapped the gears. This one may still be uploading.
 This afternoon. I ran all the parts I had been working on through the parts washer and coated then machined surfaces with WD40. For some reason they don't look clean in the picture.
There is still some fitting to do to make it right but its on the way.
Thanks to everyone who made suggestion. Even ones that don't work out help in that they get the juices flowing.
The apron is assembled but I am going to tear it down and add some wicks. Shoot a bit more video to replace some not so good stuff.
Tuesday, October 2, 2018
Future foundry posts will be to No Man's Land Foundry.
A while back I setup the No Man's Land Foundry blog. In the future I will be posting foundry related ramblings there.
Monday, October 1, 2018
Hydrated Lime in Refractory Motar
From: Traditional Oven
Refractory mortar mixing formulas
10 : 3 : 1.5 - Sand, Calcium Aluminate cement, Fireclay.
If you found hard locating refractory cement don't worry, here is one mixing formula with Portland cement plus lime available in ordinary building stores.
There are two Portland cement types, get the common gray in color, the other one is white decorative used for around pools etc. where a white effects are required.
Lime is calcium it takes over the cement in hot conditions (Portland will gradually burn out, it is used only for the mortar to set while working.)
10 : 6 : 2 : 3 – Sand, Fire Clay, Portland cement, and Lime.
First mix all dry ingredients well. Then in small amounts start adding clean water at room temperature while continuing mixing.
Mix into peanut butter consistency.
and...
and...
Mix it in wheelbarrow or straight in a bucket. After mortar looks mixed well, leave it for couple of minutes and then remix one more time. It will have slight thicker consistency after 2 mins., you may have to add a SPOON of water and mix to a peanut butter consistency. Prepare smaller quantity at the time, e.g. for one dome arch. Amount on the picture is nearly for all 3 aches, for making complete rectangular dome ceiling. ... Hoy, Rado that stuff looks quite mushy in there, oi it is mushy is it not? ... Oy ye, ye mate it is mushy, it always is mushy, ye.
Tuesday, September 25, 2018
Kerr 666 Part 2: Refractory Brick Repair with Satanite

The door is looking good.
I made a replacement brick with a plaster of paris and silica flour ratio of 1:1 with 3:1 water sodium silicate ratio. The now expected clumping, curdling, showed up. I worked through that and added perlite in some unknown quantity. By then I had lost control and just wanted to finish it. The brick looked good the next morning but a day later it had self destructed. This block was only exposed to ambient temperatures.

EDIT: it may also be a case of either the silica flour or the perlite sucking water away from the plaster causing it to not set or fail after setting.
I took one of the broken bricks from the side of the oven and encased it in satanite. The form is covered with packing tape.
To be continued...
Monday, September 24, 2018
Rebar Again

Wanted to know how well it worked on the lathe. I also used a mix of tiki torch and mineral oil for the first time. The answer is quite well.
I neglected to get a pic prior to hitting this with sand paper. Will fix that some time. Coarse sandpaper left larger scratches than the lathe tool. Worked it down to 400.
The first project for this stuff may be a set of transfer punches
Sunday, September 23, 2018
Kerr 666 Part 1: Coil Repair - Fail


Today I attempted to splice the broken coil on the Kerr 666 but could not find my good crimping tool. This will have to be redone. Thinking of making a die to make sure the wires stay aligned.
Decanted the satanite into two 2 gallon zip lock bags with about 10 lbs each. Thinking the second bag will keep longer if it is not opened until after the first is used up. That is unless I do a big job and use it all up. Who knows. PDF give a 1 year shelf life.
 Started on the door tonight. Both bricks are cracked, one is bad enough to fall out. In use gravity would hold it in but I opted to repair it. Buttered both edges and set them in place. I neglected to wet the firebrick so I don't know how well this will work.
Next I applied water and wet paper towels to the door surface and let it rest about a half an hour rewetting the towels twice.
Where its possible I am going to soak the bricks in water from now on.

Thursday, September 13, 2018


Sunday, September 9, 2018

Monday, September 3, 2018
Murray Spindle Bearings Maybe
This is for my favorite mower and old murray with a B&S opposed twin. Found a seller with the bearing numbers visible. Need to check the bearings on the deck but good bet this is it. Plan is to change out the bearings in both spindles. Only have one off atm and its not the bad one.


Saturday, August 25, 2018
Sand under microscope
Sand at 60X

Same image 3X'ed in the editor.

Not mine below. Waianapanapa, Maui Sand Much larger.
 After some debate it is not volcanic. Would need to be more solid and this is much too fine. A better guess is fine shale. Shale on its way back to clay.
But I emailed the images to a Mineralogist at The University of Oklahoma and he stated "Difficult to tell from these photos, but yes it looks like volcanic sand, not river sand. Besides
being dark in color, it is very angular. It has not been transported by water."
The following maybe wishful thinking or it may apply. As things generally go I aspect it does not. On the off chance this stuff is refractory it needs exploring.
I dug around the internet and found
Series: National Park Service Geodiversity Atlas NPS Geodiversity Atlas—Capulin Volcano National Monument, New Mexico
and from various places on Wikipedia
"Feldspar is a common raw material used in glassmaking, ceramics, and to some extent as a filler and extender in paint, plastics, and rubber. In glassmaking, alumina from feldspar improves product hardness, durability, and resistance to chemical corrosion: …. Chemical weathering of feldspars results in the formation of clay minerals[16] such as illite and kaolinite.
Kaolinite has a low shrink–swell capacity and a low cation-exchange capacity (1–15 meq/100 g). It is a soft, earthy, usually white, mineral (dioctahedral phyllosilicate clay), produced by the chemical weathering of aluminium silicate minerals like feldspar. In many parts of the world it is colored pink-orange-red by iron oxide, giving it a distinct rust hue.
Same image 3X'ed in the editor.

But I emailed the images to a Mineralogist at The University of Oklahoma and he stated "Difficult to tell from these photos, but yes it looks like volcanic sand, not river sand. Besides
being dark in color, it is very angular. It has not been transported by water."
The following maybe wishful thinking or it may apply. As things generally go I aspect it does not. On the off chance this stuff is refractory it needs exploring.
I dug around the internet and found
Series: National Park Service Geodiversity Atlas NPS Geodiversity Atlas—Capulin Volcano National Monument, New Mexico
The pertinent paragraph follows.
"Capulin Basalt. Capulin Volcano National Monument and the surrounding area are composed entirely of a single, formally named map unit— Capulin Basalt. Analysis of rock samples from Capulin Volcano and nearby Baby Capulin, a cinder cone outside the monument, found that the rock is technically a “trachybasalt,” having more abundant alkali elements, such as sodium and potassium, than true basalt. The presence of Dakota Sandstone xenoliths (foreign rock fragments) and xenocrysts (foreign crystals) is a characteristic feature of Capulin Basalt. Silica from Dakota Sandstone quartz grains is a factor in the relatively high amount of silica (50%–55%) in Capulin Basalt."and from various places on Wikipedia
Trachybasalt is a volcanic rock with a composition between trachyte and basalt. Minerals in trachybasalt include alkali feldspar, calcic plagioclase, olivine, clinopyroxene and likely very small amounts of leucite or analcime.[1] Trachybasalt is a basalt with high alkali content (5 to 7% Na2O + K2O, see TAS diagram).
"Feldspar is a common raw material used in glassmaking, ceramics, and to some extent as a filler and extender in paint, plastics, and rubber. In glassmaking, alumina from feldspar improves product hardness, durability, and resistance to chemical corrosion: …. Chemical weathering of feldspars results in the formation of clay minerals[16] such as illite and kaolinite.
Kaolinite has a low shrink–swell capacity and a low cation-exchange capacity (1–15 meq/100 g). It is a soft, earthy, usually white, mineral (dioctahedral phyllosilicate clay), produced by the chemical weathering of aluminium silicate minerals like feldspar. In many parts of the world it is colored pink-orange-red by iron oxide, giving it a distinct rust hue.
Wednesday, August 22, 2018
Kerr 666 Autopsy
I opted to move the Kerr 666 from out behind the door. Rather unhandy when pouring outside. Along the way I took it over to the east shop to pour an ant hill. It came up to 600C and stopped heating.
Today I pulled out the heating element.


The element is laying on its side. When installed the bottom of the U show here is the oven top.
It is possible that the destructing tin can and the flux mix it contained burned a hole through the element. The black stain seems to indicate that.
The logical thing to do is to replace the element with coils cut into the fire brick. If there is room.
But first I may try opening up the wound and crimping the wires together then encasing them in clay or glass of some sort.
But first I may try opening up the wound and crimping the wires together then encasing them in clay or glass of some sort.
Sunday, August 19, 2018
Brain Storm: Fpimdry furnace preheat (bad idea)
I have been thinking about foundry furnace insulation.
If one were to use an open space between the hot face casting and additional insulation it should be possible to blow cold air through it. What if one were to take that now warm/hot air and run it back into the burner.
Obviously one would be in trouble if the air was hot enough to ignite the fuel in the burner pipe.
But why do this:
1: Less heat would get to the insulation. Cheaper insulation maybe?
2: The reclaimed heat would be recycled back into the furnace.
There are several things I don't like
1. Added complexity
2. Greater temperature differential between the two sides of the hot face. stress?
3. The possibility of light off the fuel inside the burner.
As I have envisioned it there is little doubt it is a bad idea. So why did I write it down. Because it was a tool for exploring the concept. And maybe it will lead to something better.
Update
Last year I dried the sand on carboard sheets and the clay in plastic tubs. Today I tried drying both on corrugated galvanized roofing sheets. If I remember I will add pictures later.
The sand was freshly harvested from the separation process. It dried enough to where I could run It through my normal riddle if a bit reluctantly. Switched to the 1/4" riddle and it was much easier. The mix is mostly sand and a few rocks that the larger riddle catches. So the end result is nearly the same. Saved the small rocks for making thin concrete slabs.
The clay was pulled from the bottom of the processing tank. Where I save the water that runs off the round tubs. The clay settles to the bottom and I reused the water to wash the 'dirt' again, rinse repeat.
Anyway the clay is much denser but still wet as I write this. I moved it into the shop so as not to loose it to rain which seems to be every other night. Last two totaled 80 hundredths.
My hope is that the clay will dry in a form that is easier to powder than the stuff which has been allowed to dry to where it feels like pottery clay.
Saturday, August 18, 2018
Zombie Labs Looks at my local sand, is it volcanic ?
Introducing a new group of vids "Zombie Labs". The first video is a work in progress and I will not make it public on YouTube until it is finished.
In this the first I compare my local sand to play sand.
Although it is not yet in this video it looks like my local sand may have come from Mt Capulin in New Mexico not far away.
" The color of basalt is usually gray to black with weathered flows having a dark brown to reddish rust color. Common minerals are plagioclase feldspar, pyroxene, and olivine, and less commonly biotite, hornblende, magnetite, hematite, apatite and quartz. Basalt flows commonly form rough terrain, very difficult to cross with horses, that the Spanish immigrants called malpais"
Sounds about right. Need to toss it in the oven and see if it melts. Thinking not or it would be sticking to the aluminum.
Thursday, August 16, 2018
Bandsaw table insert.
Made this a while back for Emma's Spare Room Tool Competition. What you see is what came out of the sand.


Rebar Again
Heated the rebar in the burnout oven to approximately 740C.
Dumped in a pan of water did not swish.
Kind of files. Much harder then earlier.
Brittle.

Dumped in a pan of water did not swish.
Kind of files. Much harder then earlier.
Brittle.

Wednesday, August 8, 2018
Shop vac bearing replacement.
Sunday, August 5, 2018
DIY Refractory test to determine yeild (updated)
Recipe is from BackYardMetalCasting. Found the same at Delft Clay NZ
I expect there are better formulations for refractory but his one is all easy to get stuff. The original formulation calls for fire clay but the Delft site says "or drillers mud" which is bentonite.
This is a corrected table. I originally stated quarts but had used pints.
A pint is one part
1.5 parts Portland cement 1.8 lb
2.0 parts play sand 3.4
1.5 parts perlite 0.13 lb
2.0 parts western bentonite clay 2.0 lb
Total 7 pints and it weights 7.3 lb
Image of same
Combined first 3 ingredients in a 5 gallon pail and tumbled for 15 minutes by wedging the pail and a foam rubber cushion into the HF concrete mixer.
Now to guess at the size of a form required. The mix is 7 pints or approximately 200 cubic inches. Made a form a 2.5" x 10" x 13.75" form with a moveable bar.. Full without the bar it is 344 cubic inches.
The actual mix filled 6 inches of the form. 10 x 6 x 2.5 =150 CI
Also found Depression-Refractory-Mix-For-The-Backyard-Foundry which uses sodium silicate grog and fire clay.
Saturday, August 4, 2018
Rebar Epoxy Removal
To remove the epoxy from the rebar I heated it in the burnout oven. Checked back and it was smoking and stinking so I turned it off. And neglected to notice the temperature. After cooling I found this.
 It seems the metal expanded and cracked off the epoxy. The bottom of the oven contains bits of broken epoxy and its still green.
I am thinking one might be able to do this in a toaster oven and keep the temperature down so the epoxy does not burn.
Need to give it a try.

I am thinking one might be able to do this in a toaster oven and keep the temperature down so the epoxy does not burn.
Need to give it a try.
Thursday, August 2, 2018
Finished converting the last of the bits from water scrapping to cup cake ingots, well all but maybe 5lbs. It was rained on two nights ago and they hissed when added to the partly full crucible so I gave that up as a bad idea.
Water scrapping results in a mix of aluminum and charcoal. Today with the mix spread out over an old carpet I used a leaf blower to remove most of the charcoal away. Much easier then removing it by had or running it with water in the concrete mixer to bust it up. Yeah I tried that.
Water scrapping results in a mix of aluminum and charcoal. Today with the mix spread out over an old carpet I used a leaf blower to remove most of the charcoal away. Much easier then removing it by had or running it with water in the concrete mixer to bust it up. Yeah I tried that.
Tuesday, July 31, 2018
Rebar identification

Looks to be checkmark or V followed
13S4 or
1354
Now to decode it
It is checkmark... makers mark
13 not sure, maybe metric diameter
S Billet Steel
4 420 grade aka grade 60 or 60 KPSI yield strength
and there are two dots below it which are what Roy at
Christ Centered Blacksmithing said was good
Happy man here. I see transfer punches and such in my future
Found this which has a 13 in the same position but am not sure what it means.

Wood handled lead hammers

Monday, July 30, 2018
Rebar Grade Chart.
Roy of Christ Centered Ironworks did a vid on forging rebar. Mentioned it was marked for grade
Did a little digging and found this chart

Source
BY DAVID P. GUSTAFSON TECHNICAL DIRECTOR
CONCRETE REINFORCING STEEL INSTITUTE
I have 100s of lbs of cutoff's from highway construction. That may mean they are grade 60. Need to look for marks.
Friday, July 27, 2018
Sand Muller Tub Canidate
A fellow who collects scrap has this. I am going to cut off the feet and cut it down for use as a muller drum.

Wednesday, July 25, 2018
Tool Tip: Propane torch soldering tip
I found this propane soldering iron tip. Its the cats meow for soldering automotive wires. It's not new and I don't know where you can find them.
It slips over then torch end. I had to reduce the outside diameter of my burnz-o-matic torch to mount it.

It slips over then torch end. I had to reduce the outside diameter of my burnz-o-matic torch to mount it.

Live Center Bearings
This was written a while back but never published.
Found a video on YouTube regarding fixing a similar live center.
Amazing "Wet Paper Towel" Method of bearing removal on skully jones live center
Worked as advertised. Used a cut off socket extension to drive the towels in. It takes a surprising amount of stuffing.

Not fun picking the paper shreds out of the bearings. Not sure if both bearings are good. The bearing number is Timken Part Number A4059. It looks like a uxcell 30202 will fit even but its a mm wider. ebay has 3 for $10.https://www.ebay.com/itm/30202-Single-Deep-Groove-Ball-Bearings-Silver-Tone-35mmx15mmx12mm-3pcs/351957893328?epid=2136364554&hash=item51f25340d0:g:sxcAAOSwUwFaS5RO
I am going to clean them the best I can and see if they work.
And they did. Have them a little too tight but it runs cool so I am going to live with it.
Tuesday, July 24, 2018
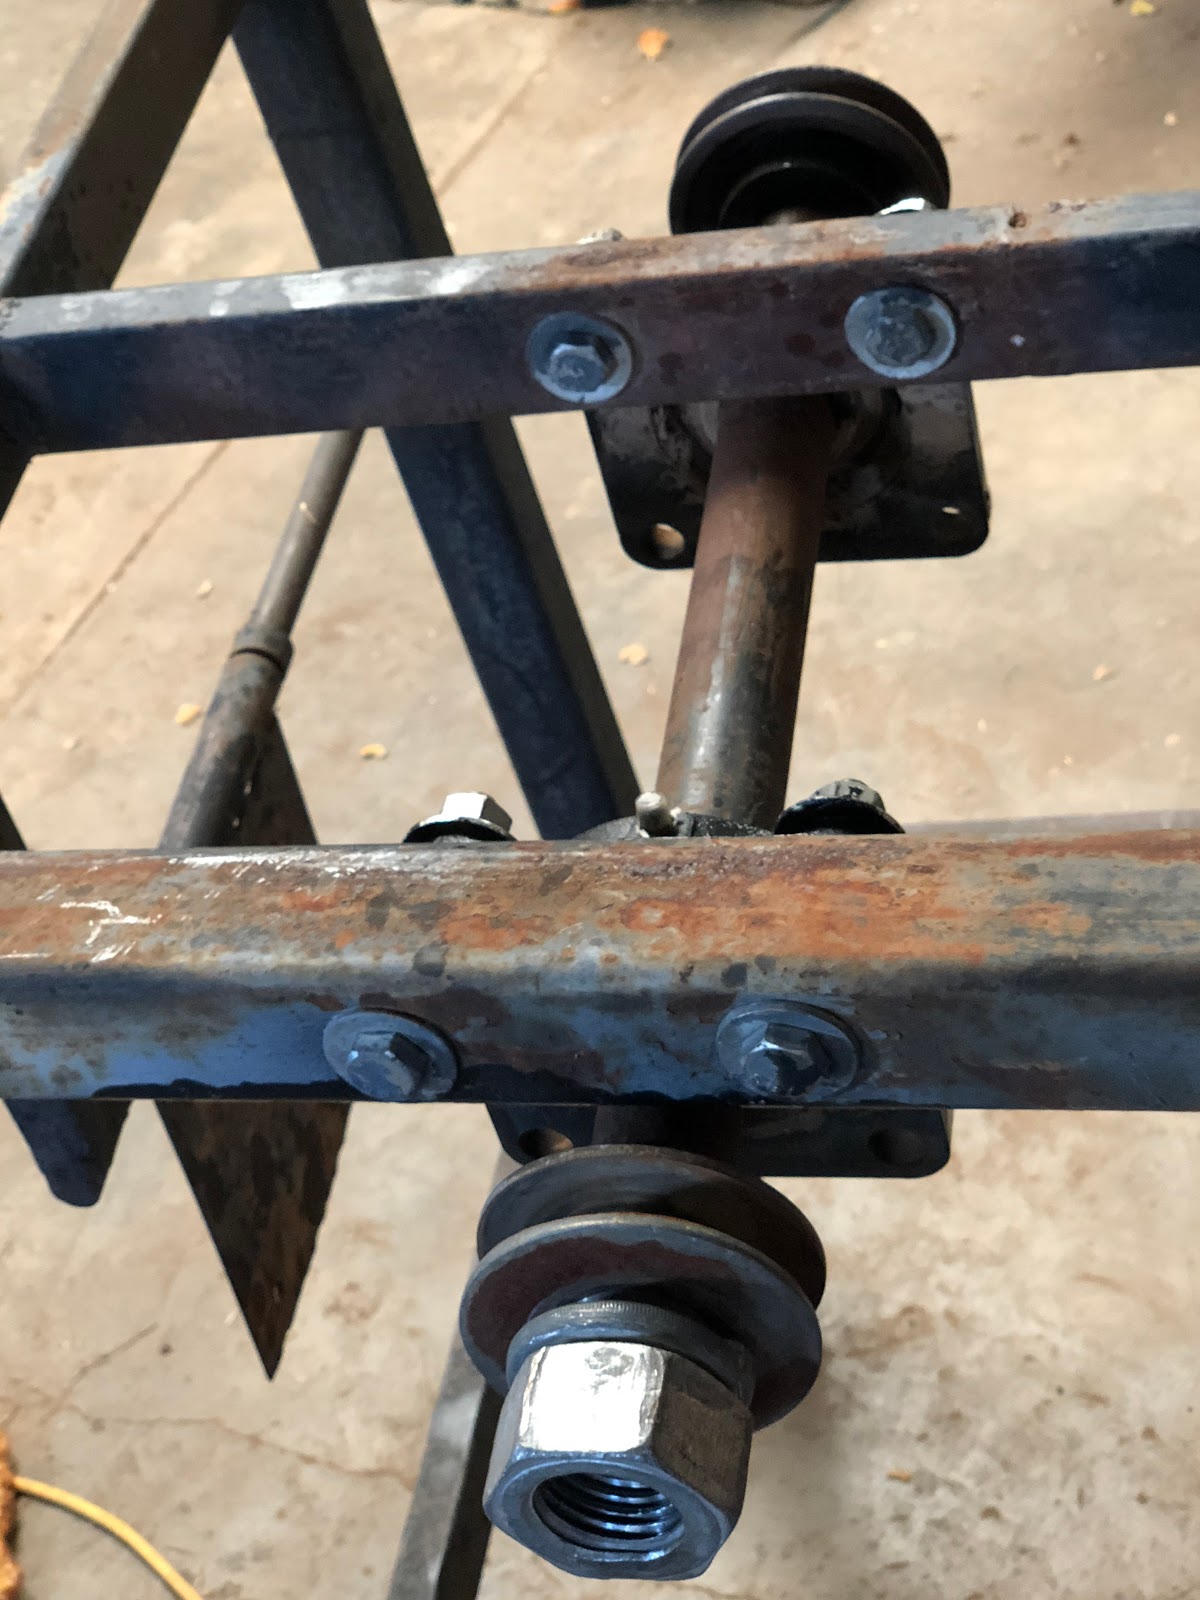
Image of aluminum pouring device and muller arbor
A heat shield has been added it. Greatly improves comfort while pouring. 2nd and 3rd images are the arbor I plan to use for the muller. Today I managed to get the nut loose and remove the saw blade the shaft is 1 1/2 inches.


Friday, July 20, 2018
Derusting comes to an end
In the short run anyway. Brought up an unaltered IBC container and placed it next to the shop to hold the washing soda solution when not in use. Now I can pump it out and reclaim the floor space. Maybe move the engine crane outdoors too.

Next Day:
The derusting tank and its anodes have been moved to outside storage. Moved a swamp cooler inside and placed it on a stand.Clothes Dryer lint screens
I was wondering if a clothes dryer lint screen would work as a fine green sand riddle To test it I riddled some of my casting sand that has been run through window screen many times. It worked.


 Window Screen
 Dryer Screen
Saturday, July 14, 2018
DYT4000 Update
A few days ago I was mowing with the DYT4000 and I would get a puff of smoke when I engaged the pto clutch. It was not getting better so I moved it into the enclosed truck. At this time I have no real motivation to open up the head. With luck it is only the gasket but then I have seen cases where most of the head was junk. Don't think that is the case but I have the BX2200 to mow with and am currently working on fixing the spindles on the RXT42 and the old Murray Briggs twin that I really like.
Subscribe to:
Posts (Atom)